80 Micro – Article Acceptance Notification

While cleaning out a closet this morning, I found a bit of interesting TRS-80 memorabilia.
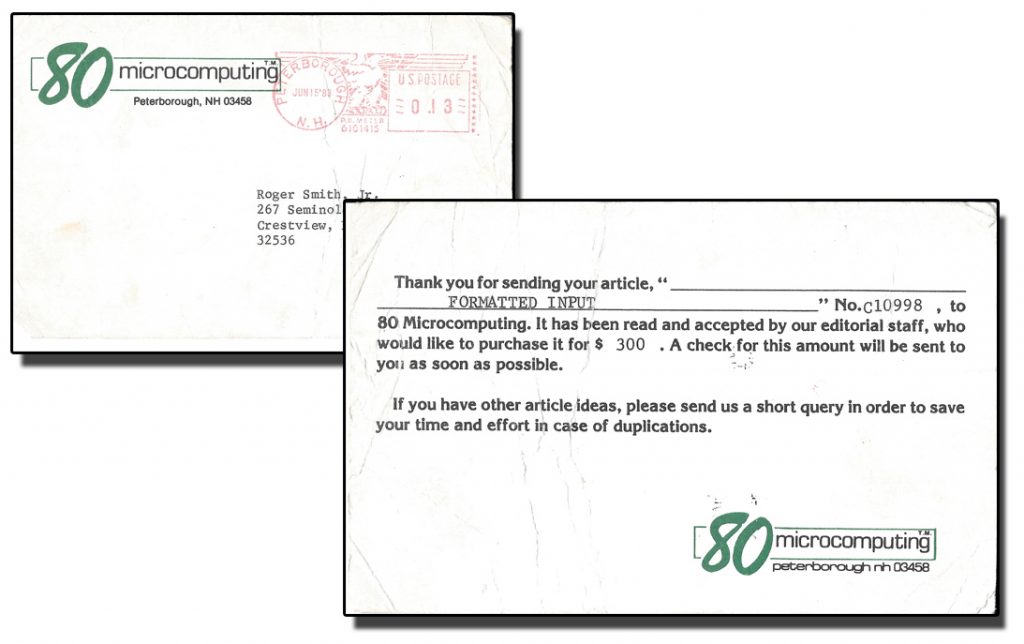
80 Micro Poscard

Back in the early 1980s, I wrote submitted several unsolicited articles about the Radio Shack TRS-80 for 80 Microcomputing magazine. Most of them were accepted and published. I received the above postcard after I submitted an article that I called “Formatted Input.”

Back then an article had to be submitted by mail. I would send the printed text of the article along with a cassette or floppy disk containing the software to the editor of the magazine. Then I would wait and anxiously check the mail each day for a response. Most magazines took several weeks to respond, but 80 Micro usually responded within a couple of weeks.

As you can see, the magazine paid $300 for the article. That was a good chuck of change back in 1983. Many of my friends at the time were working part-time jobs and not taking home that much in a month. Of course, I wasn’t publishing an article every month, but it was still a nice return on the time I spent working on the code and writing the article.

I received the postcard in June of 1983, but the article wasn’t published until the November, 1984, issue of 80 Micro. I don’t recall any other of the articles I had published taking anywhere near that long between acceptance and publication.
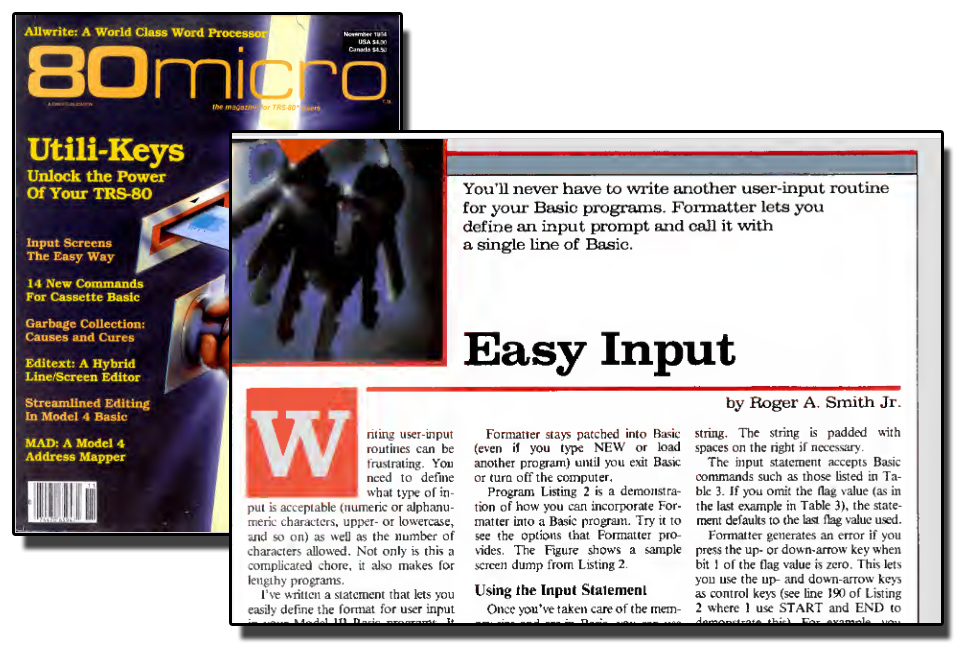
Looking at the article and the code, I’m impressed by what the 21-year-old me accomplished!

Enabling Traffic Jam Assist for the BMW i3

The following is a list of notes I took for blog post on how to enable TJA on a BMW i3. If or when I get the time, I will try to turn them into a real tutorial. In the mean time the following is offered without any warrantee or guarantee. Your mileage may vary.

  1. Download and install version 3.27.1 of eSys from https://mega.nz/#!4ZNlEaRZ!Gt4JF77lb3a4goFh1nwBtg7DsP6TETgmkY-QLrh1Wcw
  2. Download Psdzdata Lite using the “Download as a Zip” option at https://mega.nz/#F!HxZTzKDZ!VaLLlOgzuZ6kr-UoTTrl4g
  3. Unzip the file that you just downloaded.
  4. Use File Explorer to navigate to the psdzdata folder in the unzipped files. Select the psdzdata folder then click “Copy” in the ribbon bar (or press Ctrl-C).
  5. The eSys installation created a folder called c:\data. Navigate to c:\ in File Explorer and click “Paste” in the ribbon bar (or press Ctrl-V).
  6. Purchase a license for eSysx (http://esysx.com/). Install and activate eSysx. I had a few issues installing and activating eSysx. First of all, the installer displayed an error message when trying to install the Microsoft Visual C++ 2013 Redistributables. I verified that the redistributables were already installed on my computer then clicked “Yes” to the option to continue the installation. The second issue I had was that the ispiHostAdmin app didn’t display when I ran it. It turns out that it installs as an icon in your System Tray. Click the icon then the program will display.
  7. Once Activated, click the “EsysX Options” icon. Make sure the path to eSys is correct.
  8. Click “Create Custom Est.”
  9. Enter a Name and Pin then click “Create.”
  10. Enter a password for the token, check “Enable FDL Cheat Codes” and click “Apply.”
  11. Follow the prompts to save the token file in the eSys folder. Then answer “Yes” when asked if you wish to use it.
  12. Install the Quidzel doohickey as illustrated in the video. After removing the screw (my car required a 3mm hex wrench), popping out the front panel is a bit more difficult than it appears in the video. Pull the panel forward jut a bit then pull it to the right – away from the steering wheel. Once it pulls free, you won’t be able to lift it very far from the opening. Reach in the side and disconnect the three-pin plug and then you’ll be able to pull the panel free. Hook the Quidzel unit up to the three pin plug and plug the three-pin plug into the Quidzel. Stow the Quizdel thingy in the space on the left in the opening then reattach the panel.
  13. eSys – Connect = Target = I001 lqst one not direct
    Expert Mode -> Coding
    Click “Read”

Repair a Broken Charge Port Cover Strap

The rubber strap holding one of the charge port covers on my BMW i3 broke yesterday as I was plugging in the charger.

Oops!

My first thought was to use some heat shrink tubing to repair the strap. If anything, the heat shrink wrap looks like the rubber strap.

It Seemed Like a Good Idea…

But, when I applied heat to shrink the tubing it caused the rubber strap to weaken and break again.

So, I realized that I needed something that would hold up better in the Florida heat.

I just happened to have some Kevlar string on my workbench. So, I cut about a ten-inch length of the string and used it to attach the cap.

Success!

Note: It isn’t obvious, but there is a slot in the charge caps that allows them to hang on the door’s tab. You can even stack the covers when using a CSS cable.

Cap Storage
Stacked Caps

Getting Started With Your New BMW i3

My “New” 2015 BMW i3 with REX

I recently purchased a used BMW i3 with the Range Extender (Rex) option. The i3 is a true electric car, not a hybrid. But, the model I bought does include a small gasoline-powered generator (the Rex) to help extend the range of the car when a charger isn’t available or convenient.

In addition to being electric, the i3 is different from other cars in many ways. For that reason, I’m writing this post to offer some tips to new owners of the BMW i3.

Read the Fine Manual

The first thing I’d recommend is to skim through the owner’s manual. I received a printed copy in a fancy case with my car. There are also electronic versions available through the car’s “infotainment” system and online at:

https://www.bmwusa.com/owners-manuals.html

The printed version is generic, not tailored for your car. The version available electronically in the car is customized to the features of your car, but is awkward to search and available only when you are in the car. So, I recommend using the online version through the bmwusa link above. You can enter your car’s VIN so that the online version that you view will be accurate for your car’s options (until you start fiddling with coding!).

Reviewing the manual will help you discover little things about your car, such as how to move the second front cup holder into a useful spot, and more important things, such as how to use the accelerator pedal (which works differently than the pedal in most cars). Check out how to use the windshield wipers and headlights before you need them while driving.

ICE and ICEd – If you visit one of the online discussions about the BMW i3, you may come across the terms “ICE” and “ICEd” as in “I was ICEd by an ICE at the mall, yesterday.”

“ICE” is short for “Internal Combustion Engine” and is often used as a short-hand label for a typical gas-powered car.

Imagine that you are looking for a public charging station because your battery is low. You follow the directions in the PlugShare app only to discover that a gas-powered car (an ICE) is parked in the space by the charging station, blocking you from using it. You have been ICEd!

Hurry Up and Stop

Your first time driving the i3 will probably be a unique experience. The electric motor provides instant and quick acceleration. And, when you lift your foot off the “gas” pedal, the car will break … oops I mean brake! The car will slow quickly, not fall apart.

The car automatically turns on the brake lights when appropriate even if you don’t press the brake pedal.

It takes a while to get accustomed to this kind of driving. But, soon, you will find yourself seldom pressing the brake pedal except to hold the car still at stop signs and red lights.